The tale of high density Atari mystery
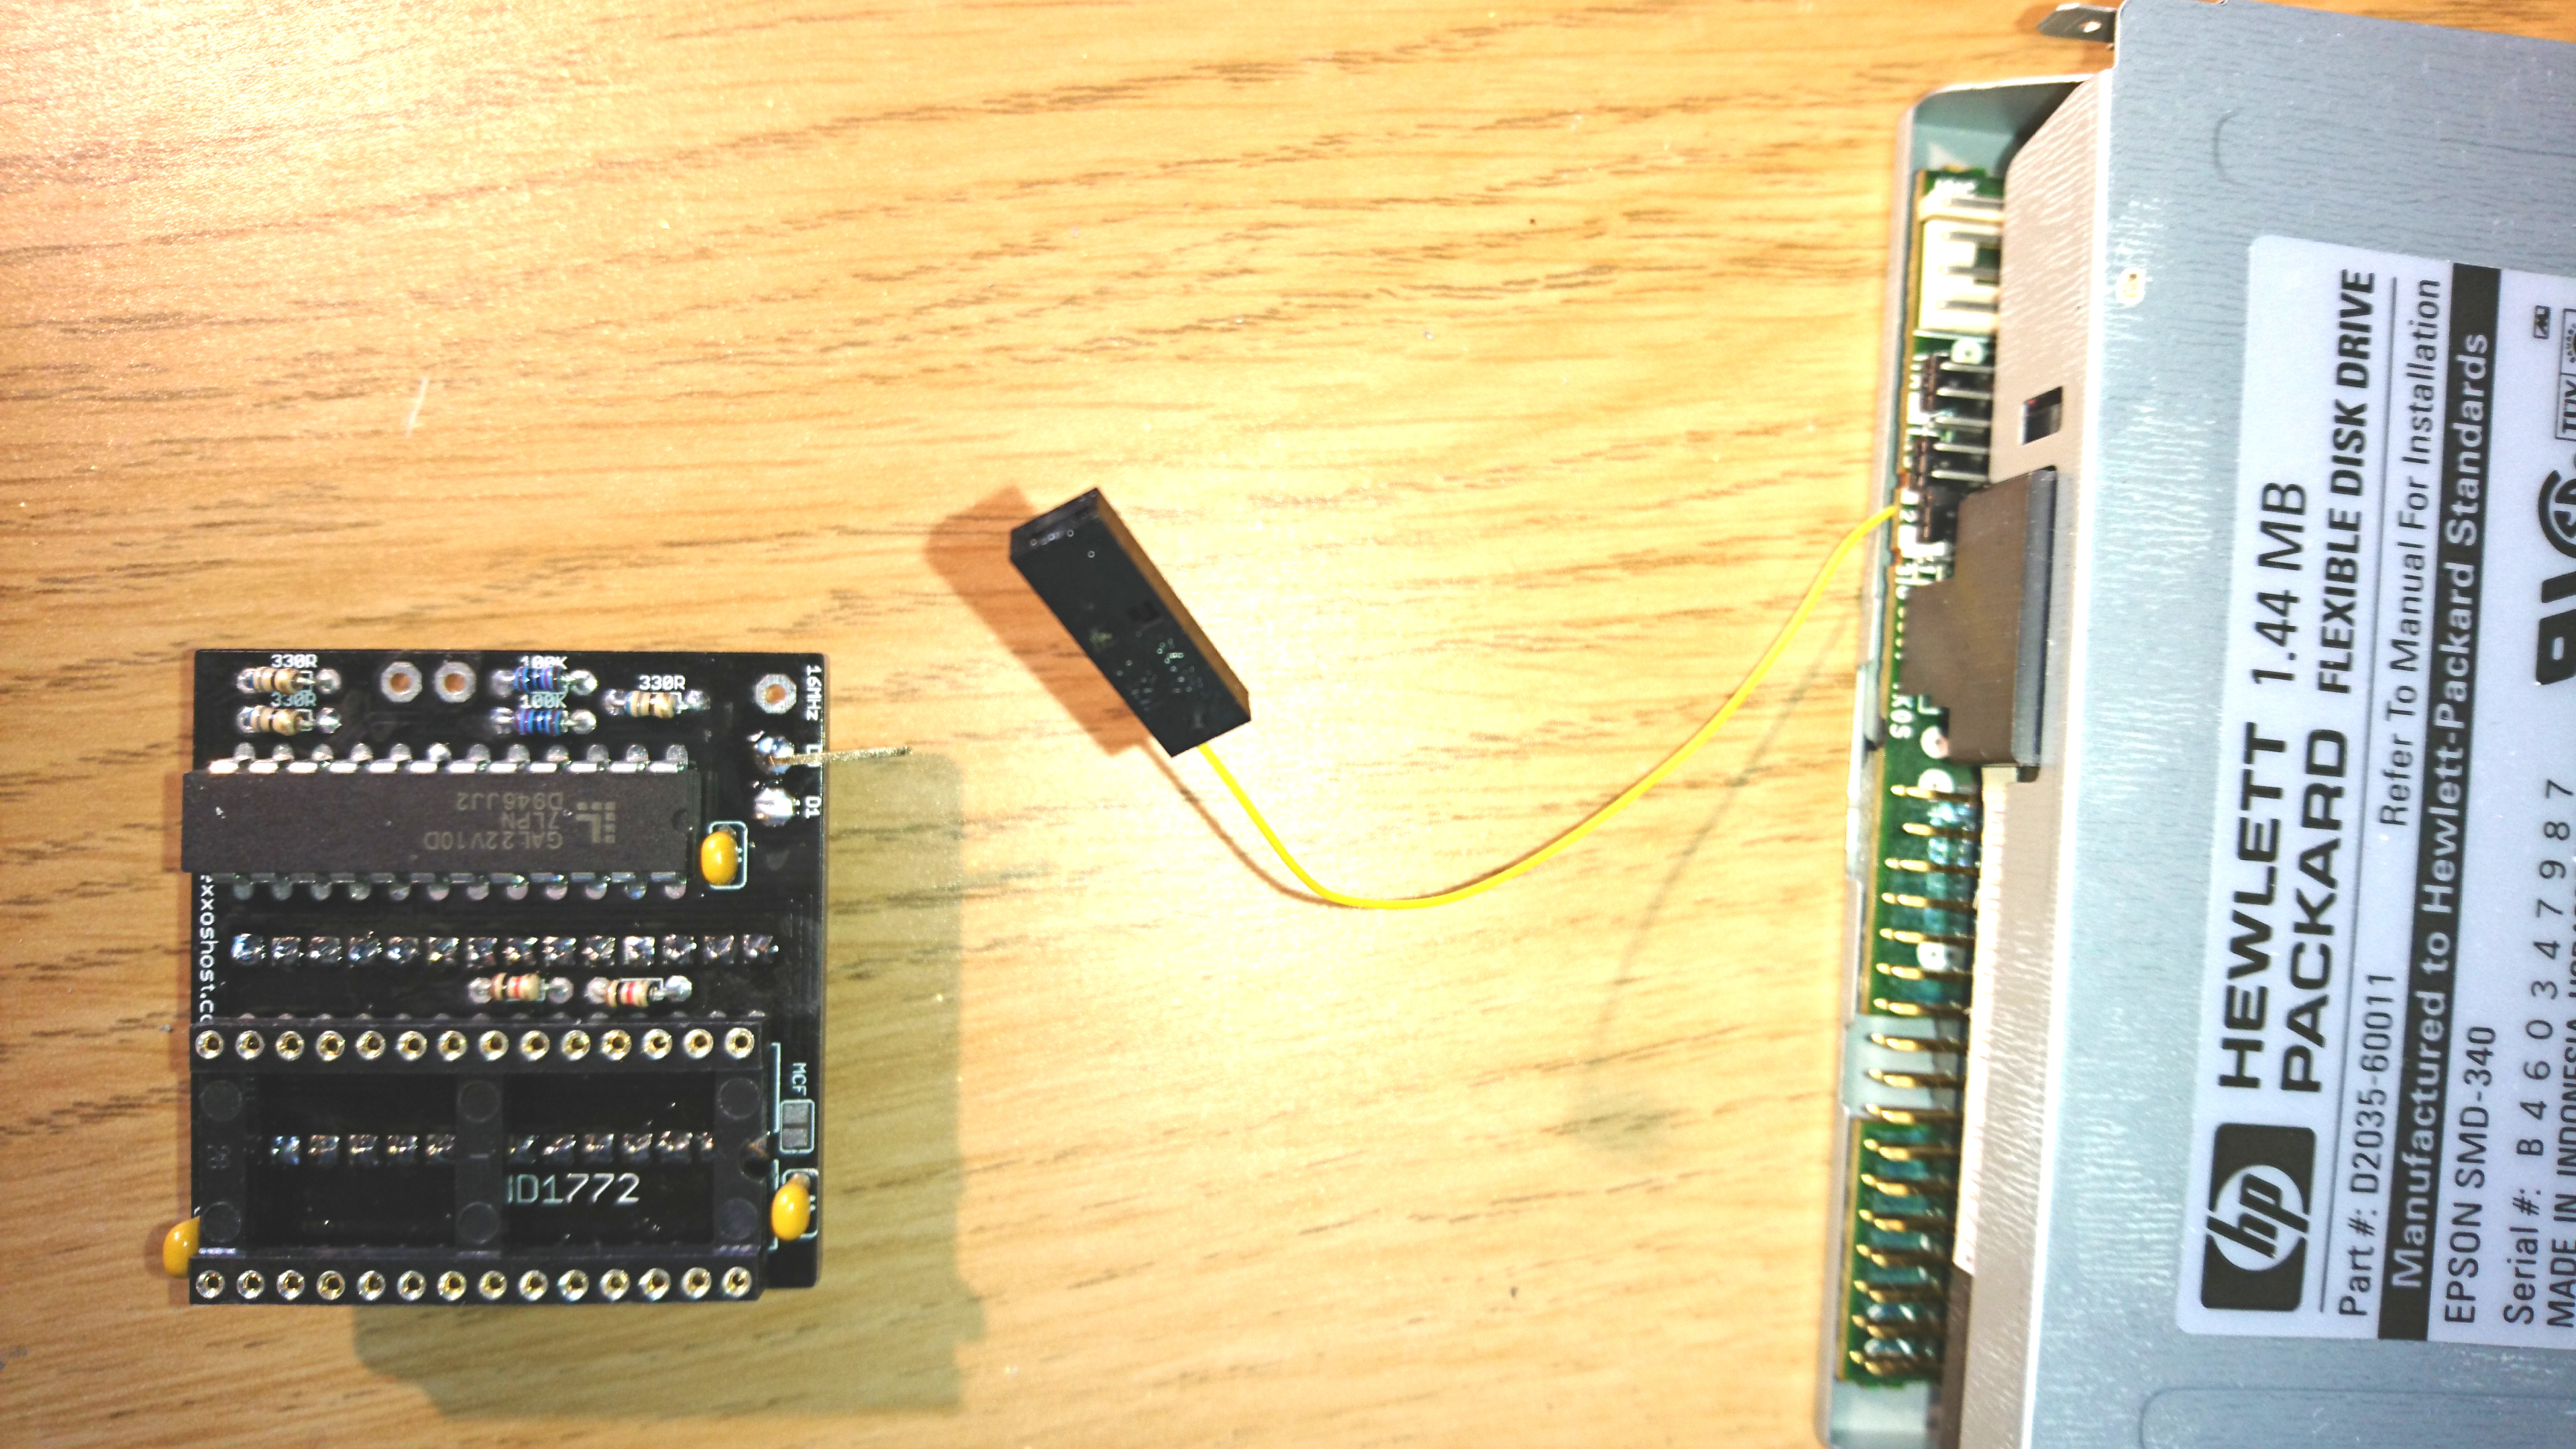
The Atari ST, like other computers at the time, had Dual Density disk drives with 720KB of storage. DD for short. Since High Density (1.44MB) appeared shortly after, Atari used such drives in the more top of the lines models Mega STE and TT. Additionally, us enthusiasts and hardware hackers added HD capability to the regular ST and STE range since it was neat to store twice the amount of data on suitable disks (and it worked pretty well cutting a hole in DD disks tricking the drives into thinking they were HD, even though the magnetic layer is slightly different). All the above is of course very well known. However, recently I’ve managed to dig up some less well known information as well as adding new discoveries about our dear 30 year old hardware. This is a post about that. Atari used several different makes of DD drives in the ST computers, but one of the more common is the Epson SMD-380. For the higher end models with HD support Atari however used one model exclusively, the Epson SMD-340. For after market HD modifications of ST:s one drive in particular became quite popular, the Sony MPF-920. If you search online for kits and instructions, that’s the drive you’ll find the most info on. It’s not only the drive that decides whether to write in Double Density or High Density however. The data needs to be clocked faster through the drive onto the disk, and so it’s not enough just swapping in and out the drives mentioned above to choose between DD and HD support. A neat little trick is that the floppy controller used by Atari, the 1772 (made by WD and VL), outputs a DD capable signal when clocked at 8MHz and HD when clocked at 16. In a regular ST it’s always clocked at 8MHz, and in the Mega STE and TT Atari used carefully tested chips that could do 16MHz (and later elected to produce a variant themselves, known as the AJAX chip, that was designed to run at 16). The way to get HD support in a regular ST is thus to clock the floppy controller at 16MHz when writing/reading an HD disk. I might be misremembering, but I think my own first HD mod needed manual selection through a switch and so I needed to select the right position depending on the disk I used. A much better option is of course to ask the drive if there’s a DD or HD disk inserted, and switch clock speed depending on that. This is what’s well documented for the Sony MPF-920 and is how the many different “HD kits” know what to select. Now here’s where things start to get confusing. In many places you can find documentation to the effect of pin 2 of the floppy interface being a density select signal. An output. While that might be true for some drives, my research says that it’s an input . The Atari Mega STE and TT (the Epson 340 drive) does not get told whether there’s an DD or HD disk in the drive, and yet they still have full support for both formats. This part of the mystery took me to an old discussion thread from 2008 which seems to be the first time someone actually looked into how this was done. There’s a memory mapped register, handled by a PAL chip, that the Atari operating system (TOS) writes to to set the clock frequency of the floppy controller. The logical conclusion is thus that TOS switches frequency when encountering errors and retries. In that sense, the after market ST mods did a much better job. The drive told a piece of circuitry what it should use and the clock frequency was then set correctly. Many many ST top cases have been horribly butchered to make room for the normal eject button of most HD drives instead of Atari’s nice slanted cutout. Of course, I wanted to make my tricked out STE (see other posts) read HD disks as well, since I spend a lot of time archiving lost treasures and sometimes come across HD disks. I did not want to butcher the top casing though. Idea: Use the same HD drive as Atari. The front plate and eject button of the Epson 340 and 380 are interchangeable, and the Epson 340 can still be found used online (and after some digging I found that it was also sold by Hewlett Packard under their brand as D2035-60011). I also bought an HD-kit from exxos that seemed to handle some obscure effects (steprate issues) adding HD to ST:s can cause.

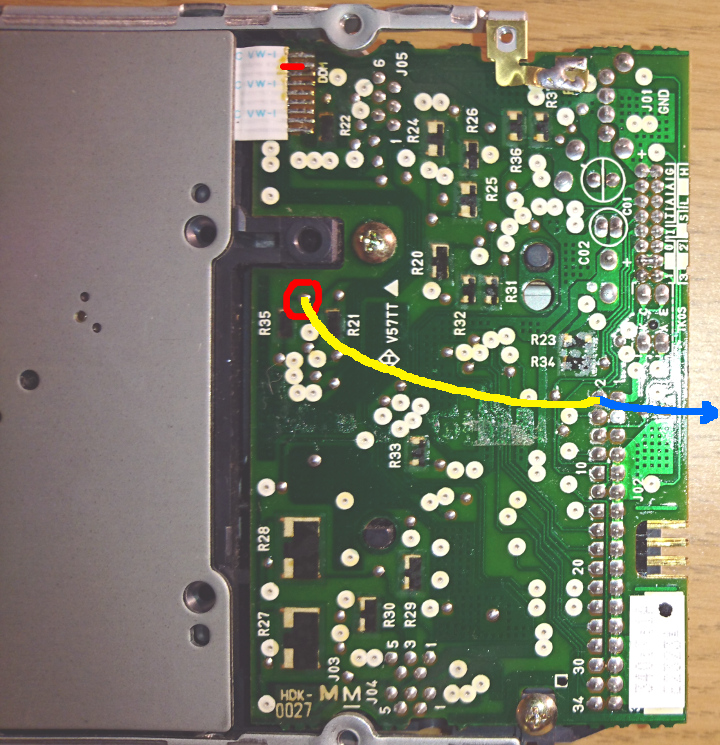
Here’s where I realized that although it’s easy to find where to pick the density detect signal on other drives (like the Sony) absolutely no one seemed to have ever done it on Atari’s HD drive of choice (!). After some measuring and tracing I found the spots to use , and although the drive can be set to handle density internally I also only got it to work if giving the drive its own density detect signal as input on the density select pin #2, and told it to use the external signal (jumper 1-2 & 5-13).

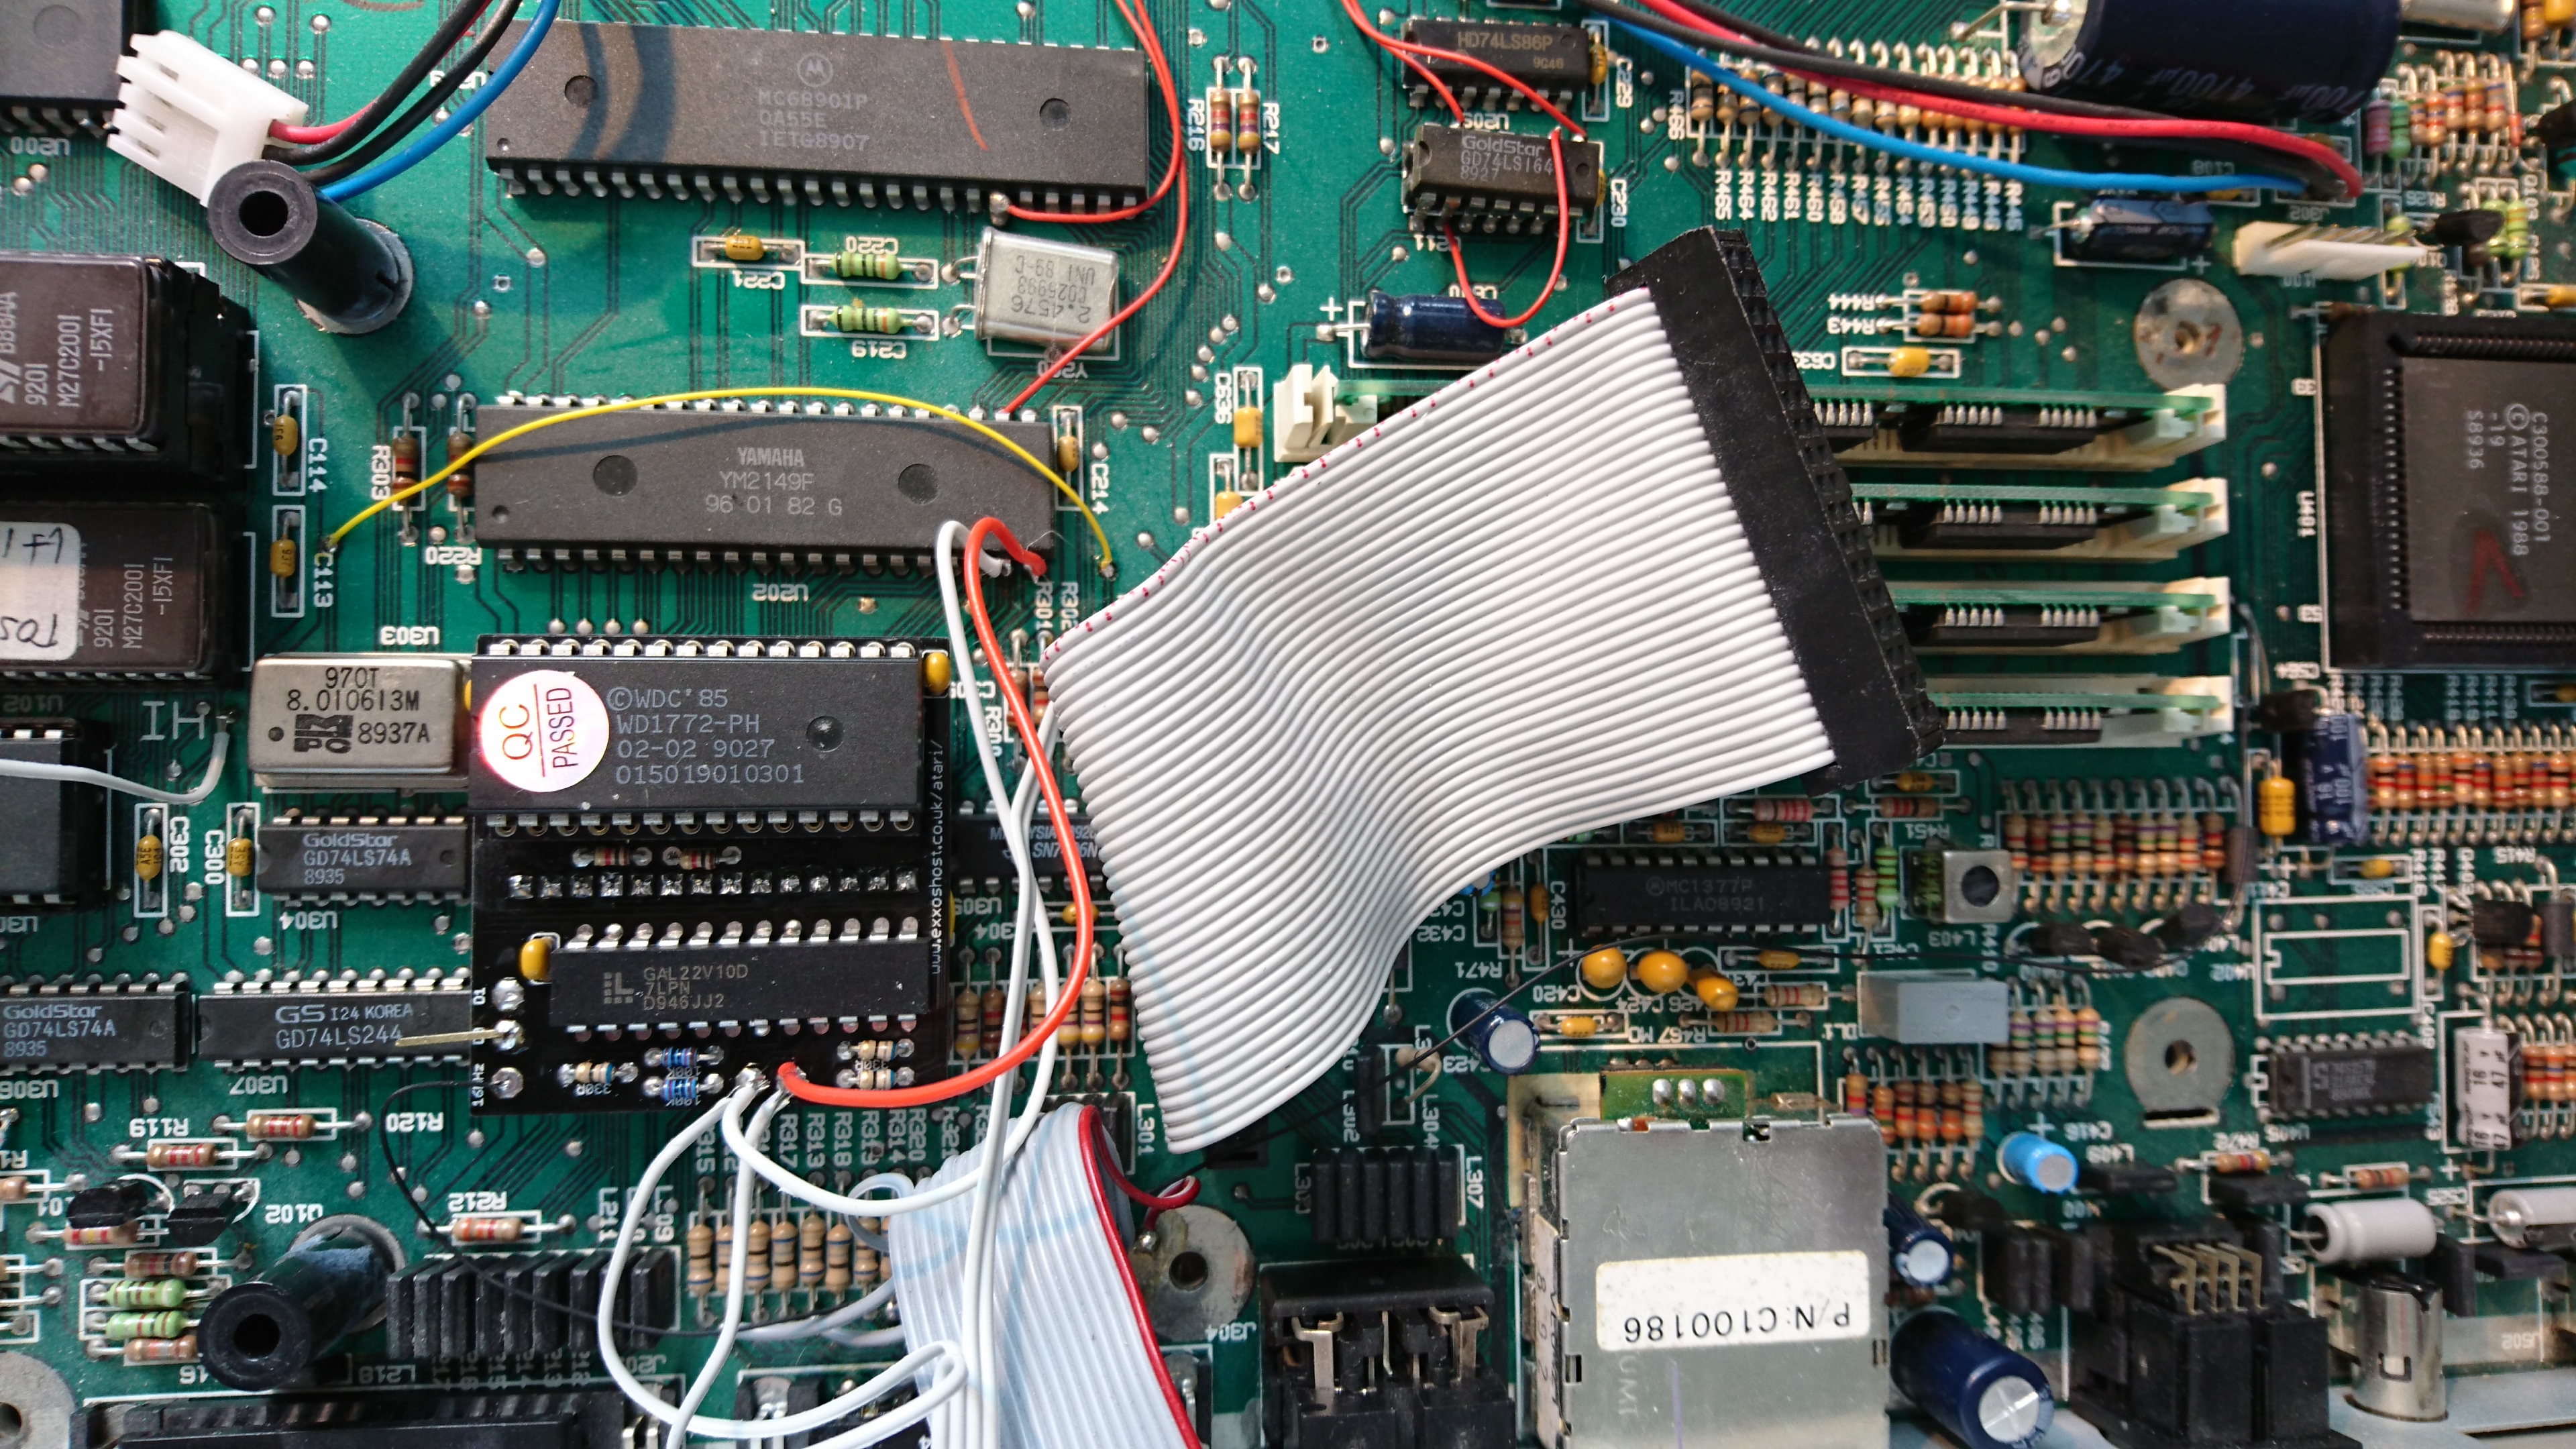
Since I have two drives internally (an HxC and the internal floppy) and a switch to choose which is A: and B: respectively, I also had to create a logic table on which signals should select which input and density. The result was (disregard the wiring on the image, I don’t seem to have one from the final conclusion) that the kit should get post-switch signals and D1 should get density detect from the drive. With all this done, my STE now has full DD and HD support - with a beautiful and newly refurbished Epson 340 as the internal drive. I save my case cutting for LCD displays, SD card slots and USB ports ;) DD: YM DS0 —— no switch —— HD-kit DS0 —— cable DS0 (8MHz) = floppy A: DD: YM DS1 —— no switch —— HD-kit DS1 —— cable DS1 (8MHz) = HxC B: DD: YM DS0 ———— switch ———— HD-kit DS1 —— cable DS1 (8MHz) = HxC A: DD: YM DS1 ———— switch ———— HD-kit DS0 —— cable DS0 (8MHz) = floppy B: HD: YM DS0 —— no switch —— HD-kit DS0 —— cable DS0 (16MHz) = floppy A: HD: YM DS1 —— no switch —— HD-kit DS1 —— cable DS1 (8MHz) = HxC B: HD: YM DS0 ———— switch ———— HD-kit DS1 —— cable DS1 (8MHz) = HxC A: HD: YM DS1 ———— switch ———— HD-kit DS0 —— cable DS0 (16MHz) = floppy B:

(Oh, and since Atari had their own way of handling media change detect - knowing when a new disk had been inserted and you needed to re-read the FAT - a lot of disks have been trashed from the use of non-compliant drives. The exxos kit above has an optional workaround in that it always forces a re-read, but the best solution is of course to use the same HD drive as Atari did, and not having to use any media change workarounds at all)
